As summer’s heat begins to wane, there’s a hidden opportunity to supercharge your vegan garden for the months ahead. The secret? Crafting the perfect plant-based compost in August setting the stage for a bountiful fall harvest. But what makes this timing so crucial, and how can a simple compost pile transform your garden into a flourishing oasis? The answers lie just beneath the surface, waiting to enrich your garden in ways you might not have imagined.
Why Choose Plant-Based Compost?
The choice of compost can have a profound impact on your garden’s health and sustainability. Opting for plant-based compost brings numerous benefits, both for the environment and for those committed to vegan principles.
Environmental Benefits
Plant-based compost is a powerhouse for sustainable gardening. Why use harmful inorganic fertilizers that degrade soil and pollute water? These fertilizers often lead to soil degradation, water contamination, and negative impacts on biodiversity.
Plant-based compost enriches the soil naturally, improving structure and moisture retention. It also boosts microbial activity, reducing the need for synthetic inputs. Want to minimize your garden’s ecological footprint? Make the switch today!
Health Benefits
One often overlooked advantage of plant-based compost is its health benefits. Did you know that animal-based composts can contain contaminants like antibiotics, hormones, and pathogens? These pose risks to both human health and your garden ecosystem. By choosing plant-based compost, you keep your soil free from these hazards, promoting a healthier garden and crops. This is especially important if you eat produce directly from your garden.
Ethical Considerations
For vegan gardeners, plant-based compost aligns perfectly with their ethical stance. Why compromise your values with animal products in gardening? Plant-based compost lets you nurture your plants while maintaining a commitment to cruelty-free practices. This choice ensures your garden truly reflects your vegan lifestyle.
Understanding the Basics of Composting
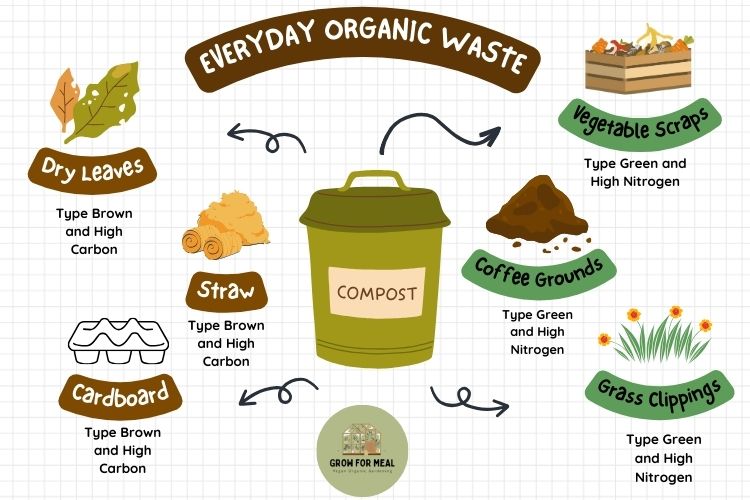
Composting is an ancient yet evolving practice that turns everyday organic waste into gardener’s gold. It involves the controlled decomposition of materials like leaves, kitchen scraps, and twigs. Driven by microbes and invertebrates, this process converts waste into nutrient-rich humus, enriching the soil and boosting plant growth.
The science of composting is both fascinating and practical. It starts with microbial activity, breaking down organic matter in three phases. First is the mesophilic stage, where moderate temperatures promote microbial growth. Next, the thermophilic stage, with higher temperatures, speeds up decomposition and kills pathogens. Finally, the maturation stage, where compost stabilizes into humus. As the pile heats and cools, nutrients naturally recycle.
Successful composting hinges on balancing “browns” and “greens”—carbon-rich and nitrogen-rich materials, respectively. Browns, like dry leaves, straws, and cardboard, provide energy for microbes. Greens, such as vegetable scraps, grass clippings, and coffee grounds, supply essential proteins for microbial growth. Striking the right balance is crucial: too much carbon slows decomposition, while excess nitrogen causes unpleasant odors.
The table below illustrates the Carbon: Nitrogen Ratios of Various Compost Materials
| Materials | C:N |
|---|---|
| Activated sludge | 6 |
| Grass clippings | 12–15 |
| Manure | 20–50 |
| Poultry manure | 15 |
| Soil humus | 10 |
| Sawdust | 200–500 |
| Vegetable waste | 12 |
| Wheat straw | 80 |
| Wood | 400 |
Composting not only recycles nutrients back into the soil but also enhances its structure, water retention, and fertility. This environmentally friendly process reduces the volume of waste sent to landfills and mitigates the need for chemical fertilizers. Moreover, plant-based compost avoids the potential contaminants found in animal-based alternatives, ensuring a healthier garden ecosystem.
Gathering Your Materials
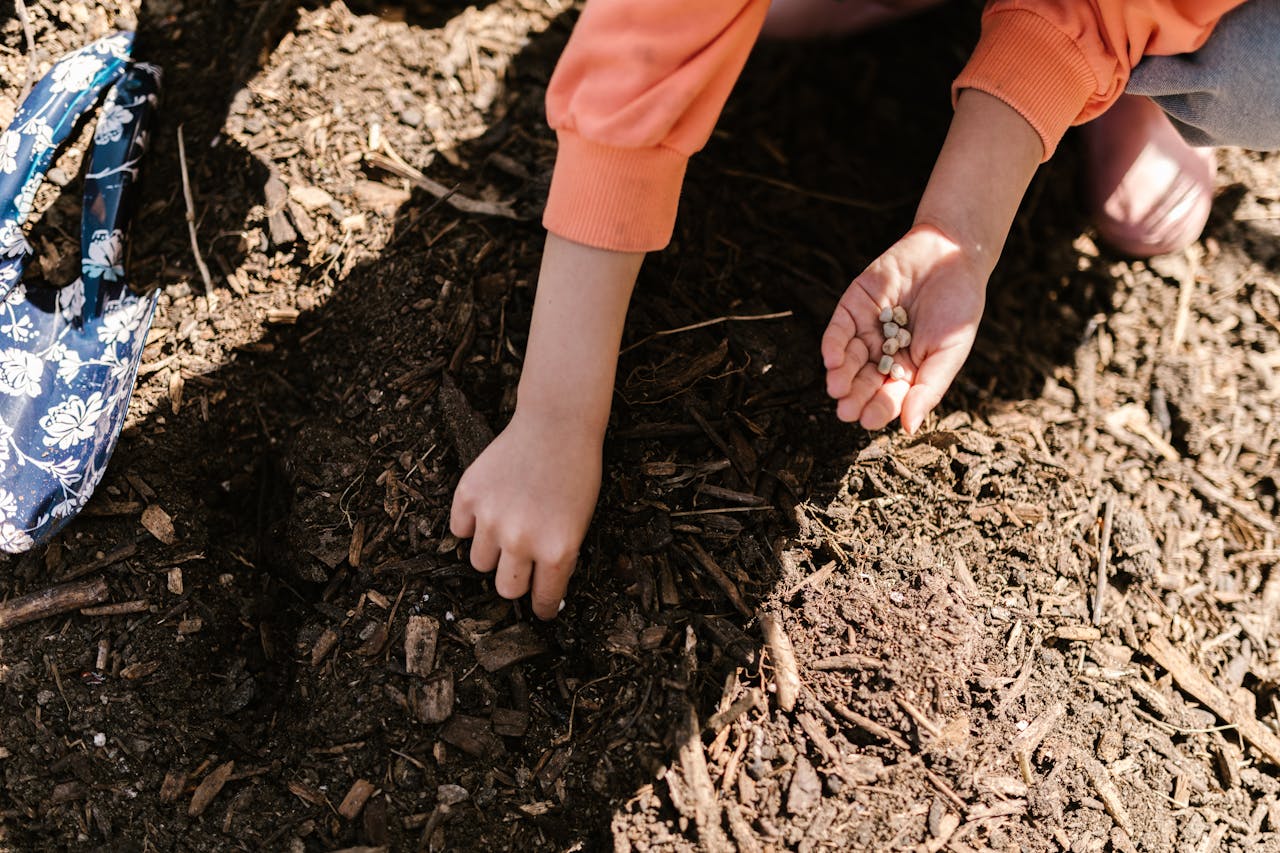
Gathering the right materials is essential to creating a robust and effective plant-based compost. Here’s a guide to common plant-based composting materials, where to source them, and what to avoid to ensure your compost pile thrives.
Common Plant-Based Materials
- Leaves: Fallen leaves are a fantastic carbon-rich component for your compost. They break down slowly, adding structure and aeration.
- Vegetable Scraps: Kitchen waste like vegetable peels, fruit scraps, and unused greens are excellent nitrogen sources.
- Coffee Grounds: Used coffee grounds are nitrogen-rich and can help speed up the composting process. They also add valuable nutrients like magnesium and potassium.
- Grass Clippings: Fresh grass clippings are another good nitrogen source, but be sure to mix them well to avoid a slimy, compacted mess.
- Straw and Hay: These materials add bulk and carbon to the compost, aiding in aeration.
- Cardboard and Newspaper: Shredded cardboard and newspaper (preferably without colored ink) can provide additional carbon.
- Garden Waste: Dead plants, stems, and old flowers can all be added to the compost pile, as long as they are disease-free.
Where to Source These Materials
- Your Backyard: Leaves, grass clippings, and garden waste can all be collected from your own yard.
- Local Cafés: Many coffee shops are happy to give away used coffee grounds.
- Neighbors and Community: Reach out to neighbors or local community groups who might have extra leaves or grass clippings.
- Farmers Markets: Vendors often have vegetable scraps and other plant materials they’re willing to part with.
- Recycling Centers: Some centers provide free mulch and compostable materials.
What to Avoid
- Meat and Dairy Products: These can attract pests and create foul odors as they decompose.
- Oily or Greasy Foods: Oils can disrupt the composting process and also attract unwanted pests.
- Diseased Plants: Adding these can spread disease through your compost and into your garden.
- Weeds with Seeds: These can survive the composting process and sprout in your garden.
- Pet Waste: This can introduce harmful pathogens to your compost.
- Synthetic Materials: Plastics, metals, and other non-organic materials should never be added to compost.
Setting Up Your Compost Bin
Choosing and setting up the right compost bin is crucial for creating a successful composting system. Whether you have a spacious backyard or a small balcony, there’s a composting solution that fits your space and needs. Here’s a guide to help you set up your compost bin effectively.
Choosing the Right Compost Bin
- Backyard Compost Bins: For larger spaces, consider a traditional compost bin or a tumbler. Traditional bins are usually made from plastic or metal and come in various sizes. Tumblers, on the other hand, are easier to turn and speed up the composting process.
- Balcony or Small Space Bins: If you’re working with limited space, a compact compost bin or a worm bin (vermicomposting) is ideal. These bins are smaller, often designed to fit neatly on a balcony or in a corner, and are perfect for apartment living.
- DIY Options: You can also create your own compost bin using simple materials like pallets, wire mesh, or even large plastic containers with ventilation holes.
Step-by-Step Guide to Setting Up Your Bin
- Select a Location: Choose a spot that’s convenient and accessible. For backyard bins, place them in a shaded area to maintain moisture and avoid overheating. For small spaces, ensure your bin is placed where it can receive some air circulation.
- Prepare the Base: If using a traditional bin, place it directly on the ground. This allows beneficial microorganisms from the soil to enter the compost. For containers, add a layer of coarse materials like straw or small branches at the bottom for drainage.
- Add Your Materials: Start by layering your compost materials. Begin with a layer of browns (carbon-rich materials) like dry leaves or straw. Follow this with a layer of greens (nitrogen-rich materials) such as vegetable scraps or coffee grounds. Continue to alternate layers, ensuring a good mix of both types.
- Turn the Pile: Regularly turning the compost helps aerate it and speeds up the decomposition process. For traditional bins, use a pitchfork or compost turner. For tumblers, simply rotate the bin according to the manufacturer’s instructions. In a worm bin, gently stir the contents as needed.
- Monitor and Adjust: Keep an eye on the compost’s moisture level. It should feel like a damp sponge. If it’s too dry, add water; if it’s too wet, add more brown materials. Ensure good airflow by turning the pile regularly.
Tips for Maintaining Airflow and Moisture Balance
- Airflow: Proper airflow is crucial for efficient composting. Ensure your bin has ventilation holes or slats to allow air to circulate. If composting in a container without built-in ventilation, you can create holes or use a fork to periodically mix the materials.
- Moisture Balance: Aim for a moisture level similar to a damp sponge. Too much moisture can lead to a smelly, slimy compost, while too little can slow down the decomposition process. Adjust by adding water or dry materials as needed.
Building Your Compost Pile
Creating a successful compost pile involves more than just tossing organic materials together. Effective composting requires attention to layering, balancing, and troubleshooting to ensure a rich, well-decomposed end product. Here’s a detailed guide to building and maintaining your compost pile.
Layering Techniques: How to Alternate Between Browns and Greens
The key to a healthy compost pile is balancing browns (carbon-rich materials) and greens (nitrogen-rich materials). Here’s how to layer effectively:
- Start with a Base Layer: Begin by laying down a 4-6 inch layer of coarse, carbon-rich materials like dry leaves, straw, or small branches. This layer helps with aeration and drainage.
- Add Greens: On top of the base layer, add a layer of nitrogen-rich materials, such as vegetable scraps, coffee grounds, or grass clippings. Aim for a 2-4 inch layer.
- Alternate Layers: Continue to alternate between layers of browns and greens. The typical ratio for effective composting is about 3 parts brown materials to 1 part green materials. This ratio helps maintain a balanced carbon-to-nitrogen ratio, which is crucial for microbial activity and efficient decomposition.
- Add Water and Air: Lightly moisten each layer as you build the pile. Ensure good airflow by turning the pile regularly, especially if it starts to feel dense or compacted.
Ideal Ratios for Effective Composting
The ideal composting ratio involves a balance between carbon and nitrogen. Generally, the optimal ratio is:
Carbon (Browns): Approximately 30 parts per 1 part of Nitrogen (Greens)
Maintaining this balance helps create the right conditions for microorganisms to break down organic matter efficiently. If you find that your compost isn’t breaking down as expected, adjust the ratio slightly by adding more green or brown materials as needed.
Troubleshooting Common Issues
- Too Wet: If your compost pile is too wet, it may become smelly and slimy. To fix this, add more carbon-rich materials like shredded newspaper or straw to absorb excess moisture. Ensure good airflow by turning the pile more frequently.
- Too Dry: A dry compost pile will decompose slowly. To remedy this, add water gradually until the pile feels like a damp sponge. Mix in some green materials, which also help retain moisture.
- Smelly Compost: Unpleasant odors often indicate an imbalance, such as too much nitrogen or insufficient aeration. Ensure proper layering and mix the pile to increase airflow. Adding brown materials can help absorb excess nitrogen and reduce odors.
- Slow Decomposition: If the compost is decomposing too slowly, it might be due to a lack of nitrogen or insufficient aeration. Check your carbon-to-nitrogen ratio and adjust as needed. Turning the pile regularly can also help speed up the process.
Maintaining Your Compost
Proper maintenance of your compost pile ensures that it breaks down efficiently and yields high-quality compost. Here’s a guide on how to keep your compost in top shape, from turning and monitoring to speeding up the process.
Turning Your Compost: Why It’s Important and How Often to Do It
Turning your compost is crucial for a few reasons:
- Aeration: Turning the compost introduces oxygen, which is essential for aerobic microorganisms that decompose organic materials. Without adequate aeration, the compost pile can become anaerobic, leading to unpleasant odors and slow decomposition.
- Even Decomposition: Turning helps mix the materials, ensuring that all parts of the pile break down evenly. This prevents the formation of hot or cold spots and promotes a more uniform composting process.
How Often to Turn:
- For an active compost pile, turning it every 1-2 weeks is ideal. This frequent mixing accelerates decomposition and keeps the pile aerated.
- If you use a compost tumbler, follow the manufacturer’s recommendations, which often suggest rotating the bin once every few days to once a week.
- For larger piles, or if you notice that the compost isn’t decomposing as quickly, increase the frequency of turning.
Monitoring Progress: Signs Your Compost Is Breaking Down Properly
- Heat: A well-maintained compost pile will heat up as microorganisms break down the materials. If the pile is warm to the touch, it’s a good sign that decomposition is underway.
- Texture: The compost should gradually transform from a mix of recognizable materials into a dark, crumbly substance. The texture will become finer, and the original materials should be unrecognizable.
- Odor: Properly decomposing compost should have a pleasant, earthy smell. A foul or ammonia-like odor can indicate issues like excessive moisture or an imbalance in the carbon-to-nitrogen ratio.
- Moisture: The compost should feel like a damp sponge. If it’s too dry, it won’t decompose effectively. If it’s too wet, it may become slimy and smelly. Adjust the moisture as needed by adding water or dry materials.
How to Speed Up the Composting Process Naturally
- Increase Aeration: Turn the compost more frequently to ensure it gets enough oxygen. This helps accelerate the breakdown of materials.
- Use Smaller Pieces: Shredding or chopping materials into smaller pieces increases their surface area, allowing microbes to work more efficiently. This includes cutting up cardboard, paper, and large plant scraps.
- Add Activators: Incorporate compost activators or boosters like finished compost or well-rotted manure. These add beneficial microbes and enhance the composting process.
- Maintain Proper Moisture: Keep the compost pile adequately moist but not soggy. If it’s too dry, it will decompose slowly; too wet, and it may become anaerobic.
- Balance Ingredients: Ensure the right ratio of carbon to nitrogen (approximately 3:1) and maintain a good balance of browns and greens. This balance promotes efficient microbial activity.
Harvesting and Using Your Compost
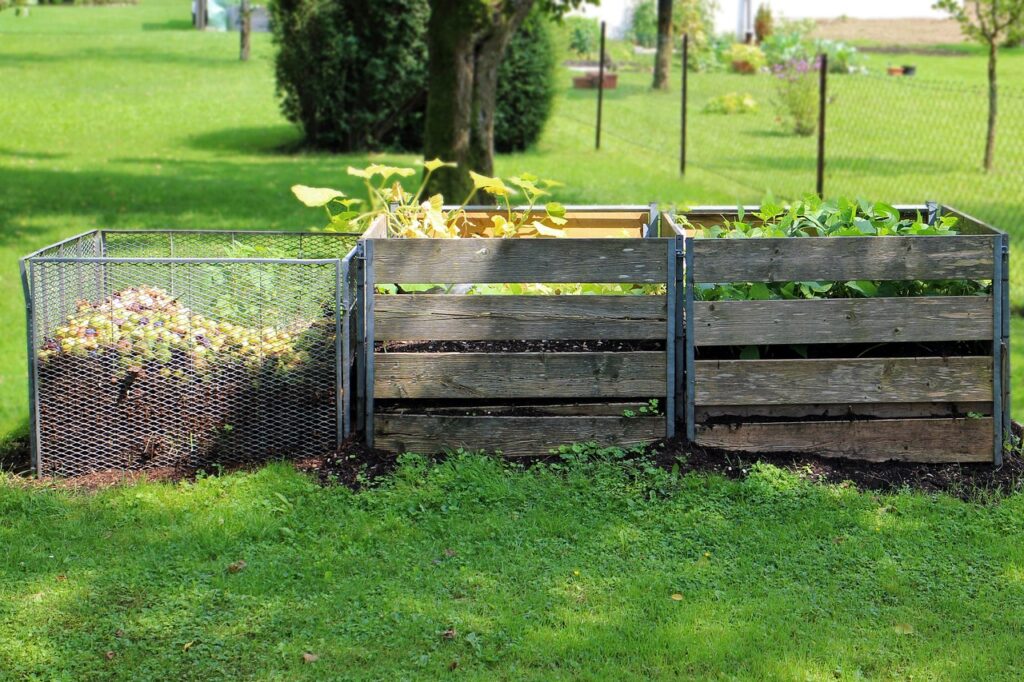
Knowing when and how to harvest your compost is crucial for making the most of this valuable resource. Here’s how to determine when your compost is ready, how to handle it, and practical ways to use it in your fall garden.
When and How to Know Your Compost Is Ready
- Appearance: Finished compost should look dark, crumbly, and rich in texture. The original materials should no longer be recognizable. It should resemble dark, soil-like humus.
- Smell: Mature compost has an earthy, pleasant smell. If it still has a strong, unpleasant odor, it may need more time to decompose.
- Temperature: The compost pile will cool down as it nears the end of the composting process. If the pile no longer generates heat when turned, it’s likely ready to harvest.
- Time: Typically, compost is ready in about 3-6 months, depending on factors like material size, moisture, and how often the pile is turned. A well-maintained pile might take less time, while a slower, less managed pile could take longer.
How to Harvest and Store Finished Compost
- Harvesting: To harvest, move the finished compost to one side of the bin or pile. This can be done using a pitchfork or shovel. Remove the mature compost, leaving any unfinished material to continue decomposing. If using a compost tumbler, empty the bin according to the manufacturer’s instructions.
- Storing: Store finished compost in a dry, well-ventilated container or bin. If not using immediately, keep it covered to prevent it from getting too wet or drying out. Compost can be kept in a pile or bin and used as needed.
Practical Ways to Use Compost in Your Fall Garden
- Preparing Beds: Before planting, incorporate compost into your garden beds. Spread a 2-4 inch layer of compost over the soil and work it in to a depth of 6-8 inches. This enriches the soil, improves structure, and enhances nutrient content for fall crops.
- Enriching Soil: Use compost as a soil amendment to boost fertility and improve soil texture. Mix it into existing soil to enhance its ability to retain moisture and provide essential nutrients to plants. This is particularly useful for garden beds that have been depleted of nutrients over the growing season.
- Mulching: Apply a 1-2 inch layer of compost around plants as mulch. This helps retain soil moisture, suppress weeds, and slowly releases nutrients as it breaks down. Mulching with compost is an excellent way to protect and nourish your plants during the fall and winter months.
With the help of these guidelines for harvesting, storing, and using compost, you’ll effectively utilize this rich, organic material to benefit your fall garden. Compost not only enhances soil health but also supports sustainable gardening practices, helping your garden thrive in the coming season.

