Plant-based Compost is a cornerstone of organic gardening, transforming waste into nutrient-rich soil that supports healthy plant growth. For vegan gardens, plant-based compost is particularly beneficial, enriching the soil without any animal products and maintaining a completely vegan ecosystem. August is the perfect time to start composting for a fall harvest—cooler weather and an abundance of organic materials make it an ideal season to begin your composting journey. Let’s explore how you can turn your everyday waste into garden gold with our DIY plant-based compost guide.
DIY Plant-Based Composting Tips for Fall
Let’s break down the steps to get the perfect compost for your veganic garden. I have divided the process into 6 steps to make it easy for you to follow.
1. Aim for a 50:50 Mix of Greens and Browns
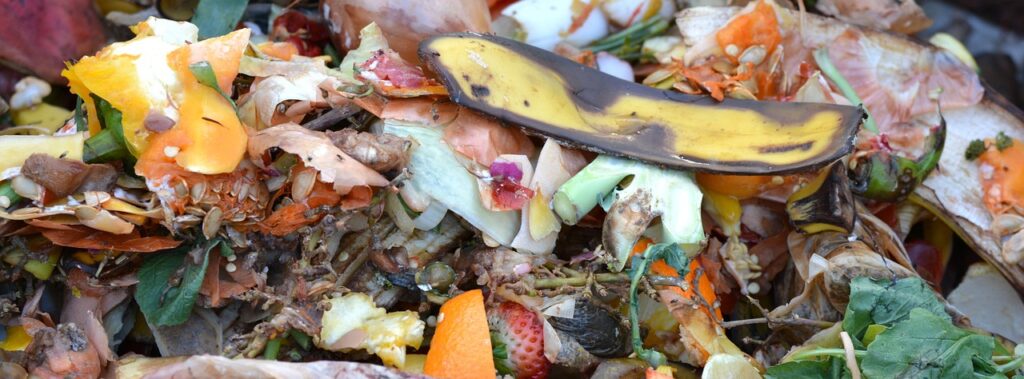
When making the perfect compost, balance is everything. Let’s break down what each component brings to the table:
Greens: These materials are rich in nitrogen, a vital nutrient that helps microbes in your compost break down organic matter. Greens include kitchen scraps like coffee grounds, fruit peels, vegetable trimmings, and grass clippings. They’re like the life of the compost party, fueling the decomposition process. However, steer clear of pet manures; they’re not ideal for your compost, especially from cats and dogs. Stick to manure from barnyard animals, which is better suited for composting.
Browns: On the flip side, we have the carbon-rich browns. These materials provide structure and airflow to your compost pile, which is crucial for aerobic decomposition. Browns include paper products (like shredded newspaper or cardboard), cornstalks, sawdust, small branches, twigs, and straw. They are the backbone of your compost pile, helping to maintain balance and prevent your compost from becoming too compacted.
For optimal composting, aim for a 50:50 ratio of greens to browns. This balance ensures that your compost pile has enough nitrogen to fuel microbial activity and enough carbon to provide structure and prevent excess moisture. If your pile leans too heavily on one side, you might end up with a stinky mess or a slow decomposition process.
A good rule of thumb is to layer your materials, starting with a base of browns, followed by a layer of greens, and then repeating the layers. This not only helps with aeration but also speeds up the decomposition process. By keeping your compost well-balanced, you’ll be on your way to creating rich, nutrient-dense compost that will be a boon to your garden.
2. Chop Up Composting Materials
Now that you’ve got your greens and browns sorted, it’s time to give your composting materials a little spa treatment. Chopping up your compost materials might seem like an extra step, but it’s essential for speeding up the decomposition process and ensuring a healthy compost pile.
Why Chop?
When you cut your compost materials into smaller pieces, you increase their surface area, which, in turn, allows microbes and fungi to break them down more efficiently. Conversely, larger pieces take longer to decompose and can slow down the entire composting process. Thus, by reducing the size of your materials, you help create a more effective and faster decomposing compost pile.
How to Chop:
- Kitchen Scraps: For items like vegetable peels, fruit scraps, and coffee grounds, you can use a knife or a food processor to chop them into smaller bits. The smaller the pieces, the quicker they’ll break down.
- Garden Waste: Use garden shears or a pruner to cut up larger items like cornstalks, branches, and twigs. If you have a lot of woody materials, consider using a chipper or shredder to break them down further. For straw or hay, simply tear or cut them into smaller pieces.
- Paper Products: Shred newspaper or cardboard by hand or with a shredder. The smaller the shreds, the better they’ll mix with other compost materials and decompose more quickly.
Benefits of Chopping:
- Faster Decomposition: Smaller pieces break down more quickly, speeding up the composting process and reducing the time you’ll need to wait for finished compost.
- Better Aeration: Chopped materials mix more easily and help maintain good airflow within the compost pile. Proper aeration is crucial for aerobic decomposition, which is the process that turns your waste into rich compost.
- Reduced Pests: Smaller pieces are less likely to attract pests like rodents, which can be a problem if large, whole items are left in the compost pile.
Practical Tips:
- Consistency: Aim for uniformity in size to ensure even decomposition. While you don’t need to get everything perfectly chopped, a general consistency helps.
- Tools: Invest in a good pair of garden shears or a shredder if you compost frequently. These tools can make the chopping process faster and less labor-intensive.
- Mixing: As you chop and add materials to your compost pile, mix them well to ensure an even distribution of greens and browns. This will help maintain balance and promote efficient decomposition.
3. Add a Compost Activator
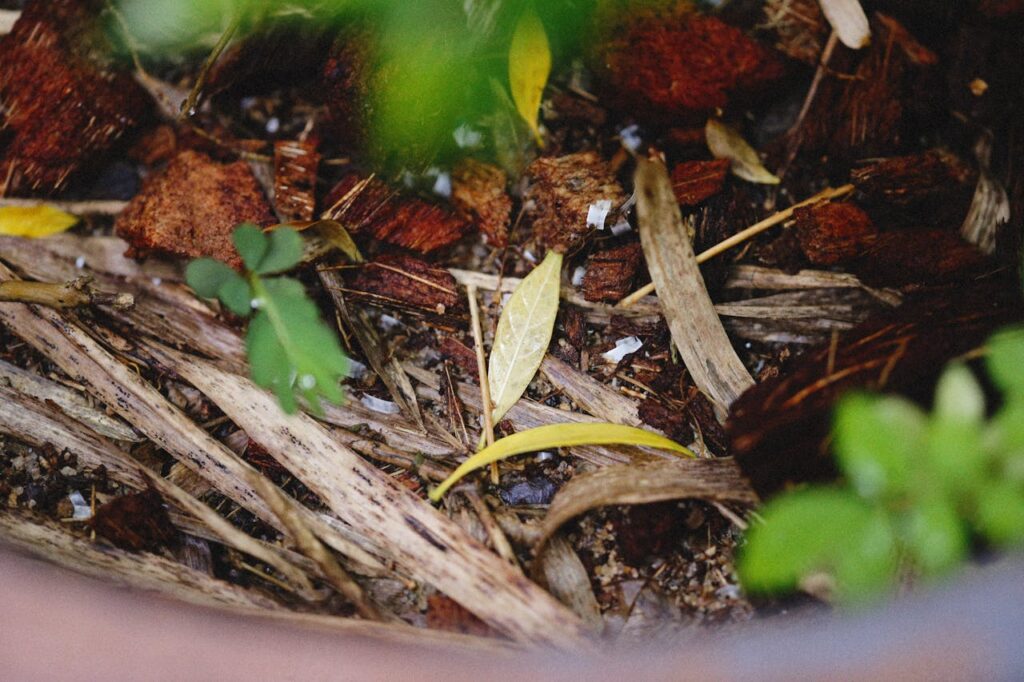
Once you’ve got your compost materials chopped and layered, it’s time to bring in the party planner—your compost activator! A compost activator, therefore, jumpstarts the decomposition process by introducing beneficial microbes that are essential for breaking down organic matter.
What is a Compost Activator?
A compost activator is a substance that boosts microbial activity in your compost pile. Specifically, these microbes, including bacteria, fungi, and other microorganisms, are the true workhorses of composting. They break down organic materials into nutrient-rich compost. Without enough of these tiny helpers, your compost pile can stagnate or decompose slowly.
Types of Compost Activators:
- Finished Compost: If you have some finished compost from a previous batch, it’s a fantastic activator. It’s packed with microbes that will help kickstart the decomposition of new materials. Just sprinkle a layer of it on top of your compost pile.
- Garden Soil: Garden soil is another excellent activator. It contains a variety of microorganisms that can enhance the microbial diversity in your compost. Simply mix in a few handfuls of soil with your compost materials.
- Commercial Compost Starters: These are products specifically designed to speed up the composting process. They often contain a mix of beneficial microbes, enzymes, and nutrients. Follow the instructions on the package for the right amount to use.
How to Add a Compost Activator:
- Sprinkle and Mix: Distribute your chosen activator evenly over the top layer of your compost pile. Use a garden fork or stick to mix it in well with the existing materials. This ensures that the activator gets properly integrated into the compost.
- Follow Instructions: If you’re using a commercial activator, be sure to follow the recommended amounts and instructions. Overuse doesn’t speed up the process and can sometimes lead to imbalances in your compost pile.
- Maintain Moisture: Activators work best in a properly moist compost pile. If you’ve just added an activator, check your compost’s moisture level. It should be like a damp sponge—moist but not soggy.
Benefits of Using a Compost Activator:
- Faster Decomposition: By boosting microbial activity, activators help break down materials more quickly, reducing the time needed to produce finished compost.
- Improved Quality: Healthy microbial activity leads to high-quality compost that’s rich in nutrients, making it more beneficial for your garden.
- Balanced Pile: Activators help maintain a balanced and active compost pile, which can prevent common issues like odor problems or slow decomposition.
4. Turn Your Compost
With your compost materials chopped, layered, and activated, it’s time to give your compost pile some love with a good turn. Turning your compost isn’t just about mixing things up; it’s a crucial step for maintaining a healthy, efficient composting process.
Why Turn Your Compost?
Turning your compost pile helps introduce oxygen, which is essential for aerobic decomposition. Aerobic decomposition is the process where microbes break down organic matter with the help of oxygen. Without adequate oxygen, your compost pile can become smelly and inefficient, and the decomposition process can, consequently, slow down.
How to Turn Your Compost:
- Choose the Right Tool:
- Pitchfork or Garden Fork: These are ideal for turning compost, especially if you have a large pile. They can handle bulky materials and mix them thoroughly.
- Shovel: For smaller piles or bins, a shovel can work well. It’s great for mixing and aerating but might not be as efficient as a pitchfork for larger piles.
- Turn Regularly:
- Aim to turn your compost pile every 1 to 2 weeks. Regular turning helps keep the composting process active and prevents the pile from becoming compacted or stagnant.
- If you notice the pile becoming dense or compacted, give it a good turn to fluff it up and improve airflow.
- How to Turn:
- Start by moving the outer layers of the pile to the center. This helps redistribute the materials and ensures that all parts of the pile get exposed to air.
- Mix in the materials from the center to the outside, creating a more even decomposition process.
- If your compost pile is particularly large or you have a compost tumbler, you can follow specific instructions for that system to ensure proper mixing.
Benefits of Turning Your Compost:
- Increased Aeration: Regular turning ensures that oxygen reaches all parts of the pile, which is crucial for aerobic microbes to thrive and break down materials efficiently.
- Faster Decomposition: By mixing the compost materials and introducing oxygen, you speed up the decomposition process and shorten the time needed to produce finished compost.
- Odor Control: Turning helps prevent unpleasant odors that can arise from anaerobic decomposition (when there isn’t enough oxygen). A well-aerated pile is less likely to develop foul smells.
Helpful Tips:
- Check Moisture: After turning, check the moisture level of your compost. It should be like a damp sponge—moist but not waterlogged. Adjust as needed by adding water or dry materials.
- Keep an Eye on Temperature: As you turn your compost, monitor the temperature. A healthy compost pile will heat up due to microbial activity. If it’s not warming up, you might need to adjust the balance of greens and browns or ensure proper aeration.
- Turning Equipment: If you have a compost tumbler, follow the manufacturer’s instructions for turning. Tumblers are designed to make mixing easy and efficient.
5. Keep Compost Heaps Covered
Now that your compost pile is happily turned and actively decomposing, it’s time to give it some well-deserved protection. Keeping your compost heap covered might seem like a simple step, but it’s crucial for maintaining the health and efficiency of your composting process.
Why Cover Your Compost Heap?
Covering your compost helps regulate temperature, moisture, and overall conditions within the pile. It prevents excess water from rainstorms, retains heat, and protects the pile from becoming too dry or too soggy. A well-covered compost heap will break down materials more effectively and keep the composting process on track.
How to Keep Your Compost Heap Covered:
- Use a Cover Material:
- Compost Bin Lid: If you’re using a compost bin, ensure it has a secure lid to protect the pile from the elements.
- Tarps or Plastic Sheets: For open compost piles, cover them with a tarp or plastic sheet. Make sure the cover is large enough to hang over the edges to keep out rain and snow.
- Wooden Boards or Pallets: You can also use wooden boards or pallets to create a makeshift cover. This can be particularly useful for larger piles or in colder climates.
- Covering Technique: Spread your cover material evenly over the top of the compost pile. Ensure it’s well-secured so it doesn’t blow away or shift during storms. If using a tarp or plastic, secure the edges with bricks, stones, or stakes to keep the cover in place.
- Ventilation: While it’s important to cover your compost, you still need to allow for some ventilation. Ensure there’s a way for air to circulate, either through gaps or vents in your compost bin or by lifting the cover periodically to allow fresh air in.
Benefits of Keeping Your Compost Heap Covered:
- Moisture Regulation: A cover prevents excess rain from soaking your compost pile, which can lead to a soggy, smelly mess. It also helps retain moisture during dry spells, ensuring the pile stays at the ideal dampness level.
- Temperature Control: Covering helps maintain the heat generated by microbial activity. A well-insulated pile will stay warmer, promoting faster decomposition even in cooler weather.
- Pest and Odor Control: A cover helps keep pests like rodents and insects out of your compost pile. It also reduces the likelihood of unpleasant odors that can arise from an exposed, overly wet compost heap.
Useful Tips:
- Check Regularly: Inspect your compost cover periodically to ensure it’s intact and properly covering the pile. Adjust as needed to accommodate changes in weather or pile size.
- Adjust for Seasons: In winter, make sure your cover provides adequate insulation to keep the composting process active. In summer, ensure the cover doesn’t trap too much heat or moisture.
- Maintain Access: If you need to turn your compost or add new materials, ensure that your cover is easy to lift or remove and replace.
6. Maintain Light Moisture in Your Compost Heap
Maintaining the right moisture level in your compost heap is crucial for a healthy and efficient composting process. Just like a well-watered garden, your compost pile needs a balanced amount of moisture to help microbes break down organic materials effectively. Too much or too little moisture can hinder the decomposition process, so let’s dive into how to get it just right.
Why is Moisture Important?
Moisture is essential for the microbial activity that drives the composting process. Microbes, fungi, and other decomposers need water to thrive and break down organic matter. If your compost is too dry, these microorganisms can’t do their job properly, leading to slow decomposition. Conversely, if your compost is too wet, it can become slimy, odoriferous, and prone to anaerobic conditions, which can slow down the process and create unpleasant smells.
How to Maintain Light Moisture:
- Check Moisture Level Regularly: Your compost should be as moist as a damp sponge—neither too soggy nor too dry. To check, grab a handful of compost and squeeze it. If a few drops of water come out, it’s just right. If it’s too dry and crumbly, it needs more moisture. If it’s too wet and muddy, it needs more brown materials to balance it out.
- Add Water as Needed:
- Dry Compost: If your compost is too dry, use a garden hose or watering can to add water gradually. Be careful not to soak it; aim for an even, light moisture.
- Wet Compost: If your compost is too wet, add more brown materials like shredded paper, straw, or cardboard. These will help absorb excess moisture and balance the compost.
- Cover and Insulate: Use a cover to help retain moisture and protect your compost from heavy rains. In dry periods, a cover also helps prevent excessive evaporation. Adjust the cover as needed to maintain the right moisture level.
- Mix and Turn: Regularly turning your compost helps redistribute moisture evenly throughout the pile. It also helps aerate the compost, which is essential for proper decomposition. If you notice parts of the pile are too dry or too wet, turning can help mix things up and even out the moisture.
Benefits of Proper Moisture Management:
- Efficient Decomposition: Maintaining the right moisture level ensures that microbes can work effectively, speeding up the decomposition process and producing high-quality compost more quickly.
- Odor Control: Proper moisture helps prevent foul odors that can arise from anaerobic conditions in a soggy compost pile. A well-balanced compost will have a pleasant, earthy smell.
- Healthy Composting Environment: A well-moisturized compost pile supports a diverse community of decomposers, including bacteria, fungi, and worms, all of which contribute to the transformation of organic waste into nutrient-rich compost.
Practical Tips:
- Adjust Seasonally: In hot, dry weather, your compost may need more frequent watering. In wet weather, make sure your cover is adequately protecting the pile from excess rain.
- Monitor Changes: Pay attention to changes in your compost pile’s appearance and smell. Adjust moisture levels as needed to maintain a healthy composting environment.
Maintaining Your Compost
To keep your compost pile working efficiently and producing high-quality compost, ongoing maintenance is key. Just like tending a garden, your compost heap requires regular care to ensure it remains balanced, active, and healthy. Here’s how to maintain your compost pile for the best results:
Regular Turning:
Turning your compost pile every 1 to 2 weeks is crucial for aeration. Aerobic decomposition, which relies on oxygen, breaks down materials more effectively and prevents unpleasant odors. Regular turning also helps distribute moisture and materials evenly throughout the pile.
Use a pitchfork or garden fork to lift and mix the compost, moving the outer layers to the center and the center to the outside. This helps keep the compost from becoming compacted and ensures all parts of the pile are exposed to air.
Monitor Moisture Levels:
Maintaining the right moisture balance is essential for microbial activity. Your compost should be as moist as a damp sponge. Too much water can lead to sogginess and odors, while too little can slow down decomposition.
Check moisture levels regularly and adjust as needed. Add water if the pile is too dry or add more brown materials if it’s too wet. Keep an eye on the pile’s condition after heavy rains or during dry spells.
Check Temperature:
A healthy compost pile generates heat due to microbial activity. The ideal temperature range for active composting falls between 130°F and 160°F (54°C to 71°C). If the pile isn’t heating up, it may need more nitrogen-rich greens or improved aeration.
Use a compost thermometer to check the internal temperature. If the pile is too cool, turn it more frequently and ensure it maintains a good balance of greens and browns.
Manage Pile Size and Structure:
- Pile Size: Aim for a compost pile that is at least 3 feet wide by 3 feet high (about 1 meter by 1 meter). Smaller piles may not generate enough heat to decompose materials effectively.
- Structure: Ensure the compost pile has good airflow by avoiding overly compacted layers. Mixing in coarse materials like small branches or straw can help maintain air pockets.
Address Issues Promptly:
If your compost smells unpleasant, it might be too wet or lacking in oxygen. To address this, turn the pile more frequently and add brown materials to absorb excess moisture. Additionally, ensure proper ventilation to help rectify the issue.
If pests like rodents or insects become a problem, check that the compost pile is well-covered. Avoid adding meat, dairy, or oily foods, as these can attract pests. Regular turning and proper coverage can also help deter unwanted visitors.
Seasonal Adjustments:
In colder weather, the compost pile may slow down. To counter this, insulate it with additional layers of straw or leaves, and keep the pile covered to retain heat. Additionally, continue turning it periodically to prevent it from freezing solid.
In hot weather, ensure the compost doesn’t dry out. To retain moisture and protect the pile from excessive sun exposure, use a cover. Additionally, turn the pile more frequently to maintain aeration.
Composting Myths Debunked
Composting is an age-old practice with modern benefits, but myths and misconceptions often cloud the path to creating rich, nutritious compost. Let’s clear the air and debunk some of the most common composting myths so you can confidently transform your organic waste into garden gold.
Myth 1: Composting Is Too Complicated
Many believe composting requires advanced knowledge and complex techniques. In reality, it’s a straightforward process that simply needs a balance of ingredients and a little attention. By understanding the basic principles—like the importance of greens and browns, moisture levels, and aeration—you can easily manage your compost pile. Start with simple steps, and as you gain experience, you’ll find composting becomes second nature.
Myth 2: You Can Only Compost Kitchen Scraps
While kitchen scraps like fruit peels and coffee grounds are excellent compost materials, they’re not the only options. Yard waste such as leaves, grass clippings, and small branches can also be composted. Even paper products like newspaper and cardboard can be added, as long as they’re shredded. The key is balancing green (nitrogen-rich) and brown (carbon-rich) materials to ensure a healthy composting process.
Myth 3: Composting Smells Bad
A well-managed compost pile should not have an unpleasant odor. If your compost smells bad, it’s often a sign of imbalance. Odors typically arise from excess moisture, lack of aeration, or an imbalance between greens and browns. Regular turning, proper moisture management, and the right mix of materials can prevent odors and keep your compost pile smelling earthy and fresh.
Myth 4: You Need Special Equipment
Contrary to popular belief, you don’t need expensive or specialized equipment to compost effectively. A simple compost bin or even an open pile can work wonders. While tumblers and bins can make the process more convenient, basic tools like a pitchfork, a shovel, and a covering for your compost pile are sufficient for most home gardeners.
Myth 5: You Can Compost Anything Organic
Not everything organic is suitable for composting. Avoid adding meat, dairy, oily foods, and pet waste to your compost pile. These materials can attract pests, create odors, and introduce pathogens. Stick to plant-based materials like fruits, vegetables, coffee grounds, eggshells, and yard waste for a healthy compost pile.
Myth 6: Composting Takes Forever
Composting does require patience, but it doesn’t take forever. With the right conditions—balanced ingredients, proper moisture, and regular turning—composting can take anywhere from a few months to a year. For faster results, maintain an active compost pile by ensuring good aeration and regular turning. The more you manage your compost, the quicker it will transform into nutrient-rich humus.
Myth 7: Composting Is Only for Gardeners
Composting isn’t just for gardeners. It’s a sustainable practice that benefits everyone by reducing landfill waste and creating valuable soil enrichment. Whether you’re a seasoned gardener or just starting out, composting helps minimize waste and contribute to a healthier environment. It’s a simple, effective way to support sustainability and enhance soil health, regardless of your gardening expertise.


Pingback: Master Plant-Based Compost with These Proven Methods - GrowForMeal
Pingback: Compost vs. Mulch: What Every Veganic Gardener Needs to Know - GrowForMeal
Pingback: Your Ultimate Beginner's Guide to Vegan Organic Gardening Tools - GrowForMeal